
Not sure which solar panels are right for your RV adventures?
Curious about how to pick the best solar package for your camper?
This article will help you choose the right size panels and components and show you how to calculate the right amount of power.
After reading this solar power guide, you’ll feel confident picking the perfect solar panels for your RV!
Table of Contents
Next Steps to Installing RV Solar Power
Want to talk to a solar panel expert?
Our team of certified technicians is here to help!

Choosing Your RV Solar Panel Size and Wattage
One of the key choices you’ll need to make is selecting the appropriate panel size and wattage for your RV solar setup. This decision directly impacts the energy your panels can generate and how well they can support your on-the-road adventures.
In this section, we’ll dive into the considerations that guide you in choosing the perfect panel size and wattage, helping you harness the sun’s energy to power your RV life effectively and efficiently.
If you want to understand the different types of panels and how they affect the amount of power you harness, check out our article: Solar Power – A Complete Guide.
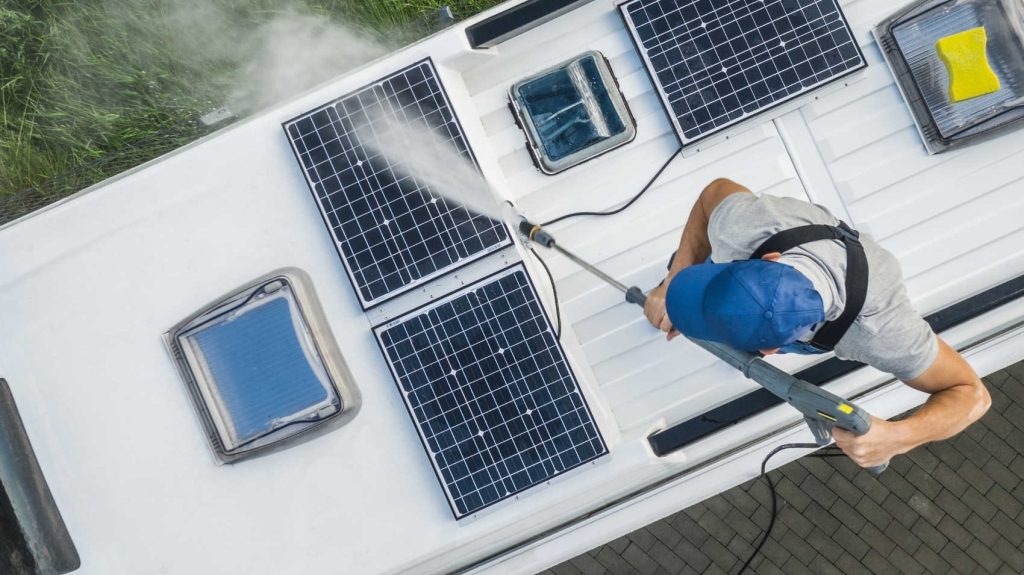
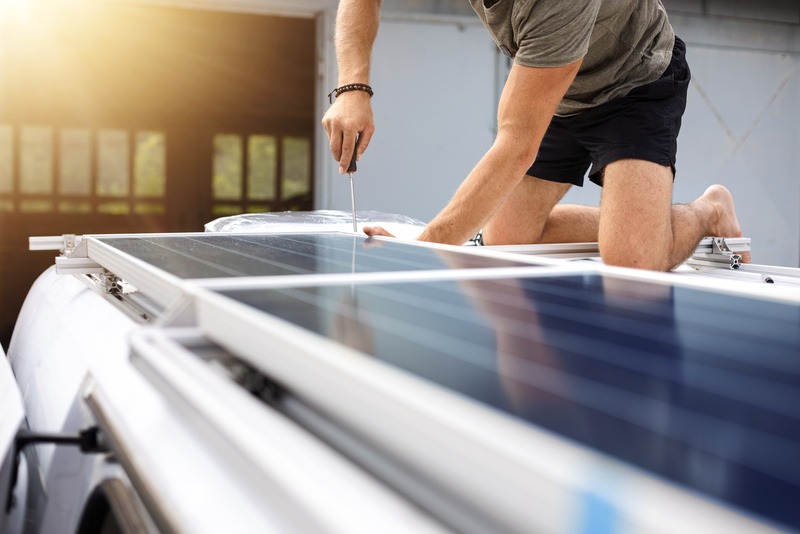
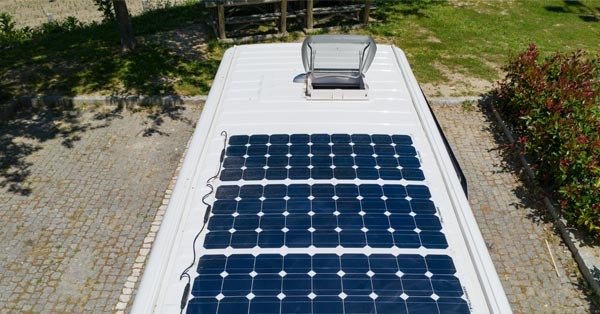
Measuring Your RV Roof Space For Solar Panels
One of the initial steps towards transitioning to solar energy for your camper is figuring out how much roof space you have available. This not only determines how many solar panels you can install but also which types of panels will fit best.
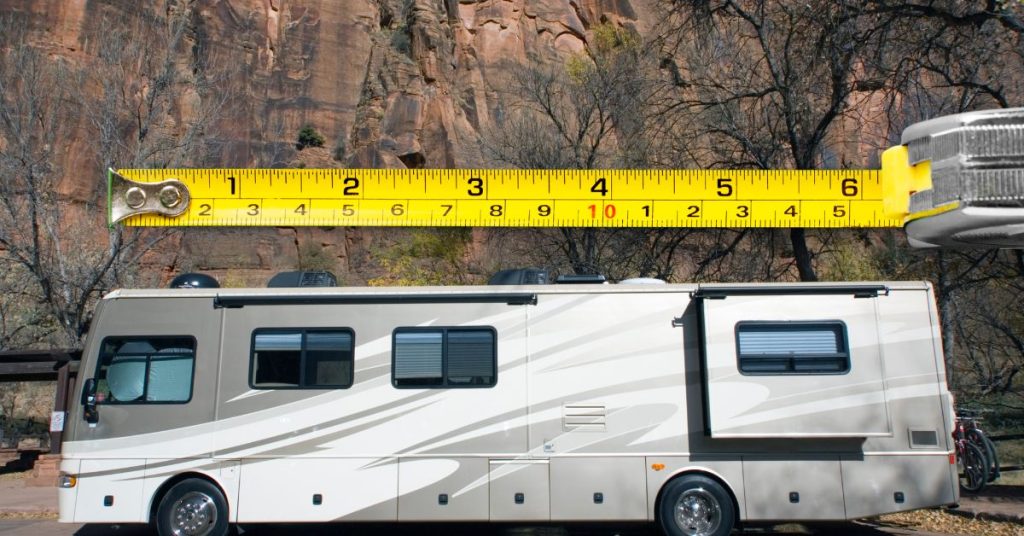
Here’s a step-by-step guide on how to accurately measure your RV roof space for solar panel installation:
- Safety First: Before you climb onto your RV’s roof, make sure you have a stable ladder and wear non-slip shoes. It might also be wise to have someone spot you or be around in case of any mishaps.
- Clear the Deck: Ensure that your RV roof is free of any debris or obstructions. This will help in getting a precise measurement without any obstacles.
- The Right Tools for the Job: You’ll need a measuring tape, a notebook or digital device to jot down measurements, and possibly some chalk or a washable marker to mark measurements directly on the roof if needed.
- Measure the Length and Width: Start by measuring the full length of the RV’s roof from front to back. Follow it up by measuring the width at its widest point.
- Account for Obstructions: Most RV roofs aren’t just blank slates. They may have air conditioners, satellite dishes, roof vents, or other installations. You will need to measure the dimensions of these obstructions and note them down. This will help you determine the usable space left for solar panels.
- Calculate Usable Area: Subtract the area of the obstructions from the total roof area to get an idea of how much space you have available for solar panels.
For example: If your roof is 20 feet long and 8 feet wide, the total area is 160 square feet. If you have an air conditioner unit occupying 20 square feet and a vent taking up 5 square feet, you’re left with 135 square feet of usable space.
- Plan for Walking Room: If you frequently access your RV roof for maintenance or other reasons, consider leaving some space free of panels. This ensures you won’t be stepping on and potentially damaging your solar panels.
- Think Flexibility: Remember that solar panels come in various sizes and shapes. With your measurements at hand, you can determine if you need larger, standard-size panels or a combination of smaller and more flexible panels to make the most out of the available space.
- Consult a Professional: Once you’ve done the initial measurements, you may want to talk to an RV solar panel specialist. Getting an expert’s opinion and insights can help guide you in making smart decisions.
Got Questions? Ask a Bish’s RV Solar Panel Expert
Bish’s certified RV technicians have been installing solar panels on campers for decades and we’re always happy to provide insights to you about maximizing efficiency, potential installation challenges, or recommendations tailored for your specific RV model.
Even if we don’t do the solar panel installation for you, we’re here to share all we know so you can have the best camping adventures possible.
Slogan to Follow When Installing Solar Panels: “Be Precise!“
Precision is the key to a successful solar panel installation. Be sure to take as precise measurements as possible.

This preparation ensures you’re making the most out of the available space, leading to an efficient and functional solar system for your on-the-go energy needs.
Calculating the Wattage Needed For Your RV’s Power Usage
Before you install solar panels on your camper, you will need to determine the amount of wattage you’ll need. This ensures you’ll have enough energy to power your RV’s appliances and devices, making for a comfortable and worry-free adventure.

Here’s how to go about calculating the wattage you’ll require:
- List Your Devices and Appliances: Begin by jotting down every electrical device and appliance you regularly use in your RV. This includes lights, refrigerator, air conditioner, heater, fans, TV, laptops, microwave, and even the coffee maker.
- Determine the Power Consumption: Check each device for a label or manual that specifies its wattage. If only amperage (A) is given, you can calculate the wattage by multiplying the amperage by the device’s voltage (V).
Wattage(W) = Amperage(A)×Voltage(V)
For example, a 2A device operating at 120V will consume 240W.
- Estimate Daily Usage: For each device, estimate how many hours you’ll use it daily. Multiply the device’s wattage by the number of hours to get the daily watt-hour (Wh) consumption.
For instance, if a 100W light is used for 5 hours daily, it will consume:
100W×5hours = 500Wh - Total Daily Consumption: Add up the daily Watt Hours (Wh) of all devices to get your RV’s total daily consumption. This gives you an idea of your daily energy requirements.
- Factor in Sunlight Hours: Solar panels only generate power during daylight. Depending on your location and the time of year, the average effective sunlight hours might vary. For many places in the U.S., this average is around 4-6 hours per day.
- Determine Solar Panel Wattage: Divide your total daily consumption by the average sunlight hours to get the wattage your solar panels need to generate.
For example, if your total daily consumption is 2000Wh and you get an average of 5 sunlight hours:
2000Wh÷5hours = 400W
This means you’d need solar panels that can produce at least 400W in total during peak sunlight.

- Include a Buffer: It’s wise to add a buffer of 20-25% more wattage to account for inefficiencies, potential shading, or unexpected power needs. This ensures you’ll have enough power even on less-than-ideal days.
- Consider Battery Storage: If you’re using solar panels to charge an RV battery bank, factor in the battery’s capacity and how many days of autonomy (days you want power without sunshine) you desire. This could increase the wattage needed.
- Consult with Professionals: It’s always beneficial to have an expert’s opinion. Consulting with an RV solar specialist can help ensure your calculations are accurate and that you’re choosing the best system for your needs.
You can learn more about calculating how much solar power you need by reading: Solar Power – A Complete Guide.
Our Bish’s team of certified technicians is always ready to answer any of your solar panel questions to help you choose the right setup for your camping needs and preferences.
Understanding your RV’s power needs is essential in selecting the right solar panel system.
By planning your solar setup to meet your specific energy requirements, you can enjoy the open road with all the comforts of home, powered sustainably by the sun.
RV Solar Panel Installation Points to Consider
The solar panel installation process isn’t as simple as just placing panels on your camper’s roof and hoping for the best. Several crucial considerations come into play to ensure optimal performance, safety, and longevity of your solar setup.
In this section, we’ll go over the key factors you need to keep in mind before and during the installation of solar panels on your RV.
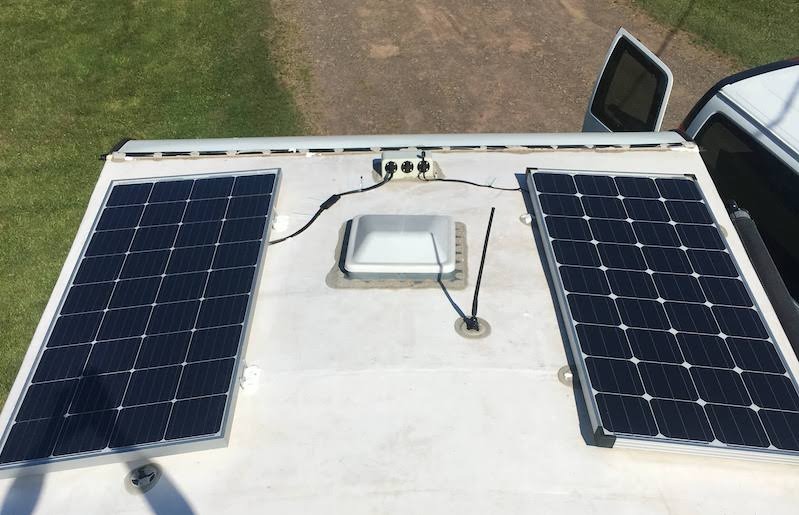
Location and Orientation of Solar Panels on your RV’s Roof
Proper location and orientation of solar panels on your RV’s roof are pivotal for harnessing maximum solar energy. Simply put, even the best solar panels can underperform if they’re not strategically positioned.
Here are some key guidelines and considerations for placing your solar panels:
- Sun Exposure: Ideally, your solar panels should be placed where they can receive direct sunlight throughout the day. Avoid areas on your RV’s roof that are shaded by vents, satellite dishes, air conditioning units, or other obstacles. Shadows can drastically reduce the energy output of your panels.
- Angle of Inclination: While flat mounting is the most common for RVs due to aerodynamics and the need to move frequently, the optimal angle for solar panels is typically equal to the latitude of your location. Some RVers use adjustable mounts to change the panel’s inclination based on their geographical location and the time of year, capturing more sunlight.
- Orientation: In the Northern Hemisphere, solar panels should generally face south to capture the most sunlight. Conversely, in the Southern Hemisphere, panels should be oriented north.
However, because RVs are mobile, the orientation might be influenced by parking limitations. It’s always a good practice to park your RV in such a way that the panels face the sun’s path. - Panel Spacing: If you’re installing multiple panels, ensure they’re spaced appropriately. Panels should be close enough to optimize space but not so close that they might cast shadows on each other, especially if they are on tilting mechanisms.
- Ventilation: Solar panels can get hot. Ensuring there’s a small gap between the panel and the roof can help with ventilation, improving the efficiency of the panel and reducing the risk of overheating.
- Accessibility: While solar panels are generally low maintenance, you might need to access them occasionally for cleaning or inspection. Place them in a way that there’s still some walkable space on your RV’s roof, or ensure they can be accessed easily from the edges.
- Aerodynamics: Consider the aerodynamic profile of your RV. Panels should be mounted securely and, where possible, in a manner that doesn’t substantially alter the vehicle’s aerodynamics, which could impact fuel efficiency.
- Future Additions: If you think you might want to add more panels in the future, plan your current installation accordingly. Leave some free space or design the setup in a modular way, allowing for easy expansions.
- While the quest for energy efficiency through solar panels is commendable, it’s the strategic location and orientation on your RV’s roof that will ensure you tap into their full potential.
It’s always a good idea to consult with solar installation experts, like Bish’s RV’s certified team of technicians, who know all the ins and outs of RV solar panel setups to get the best advice and results.
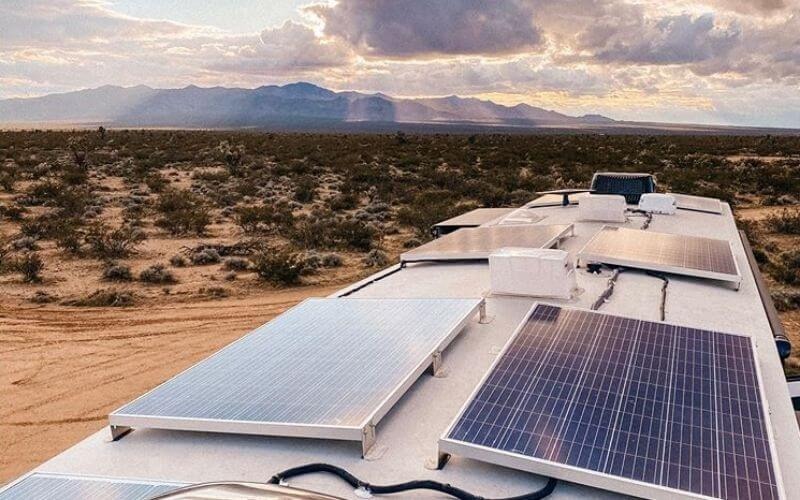
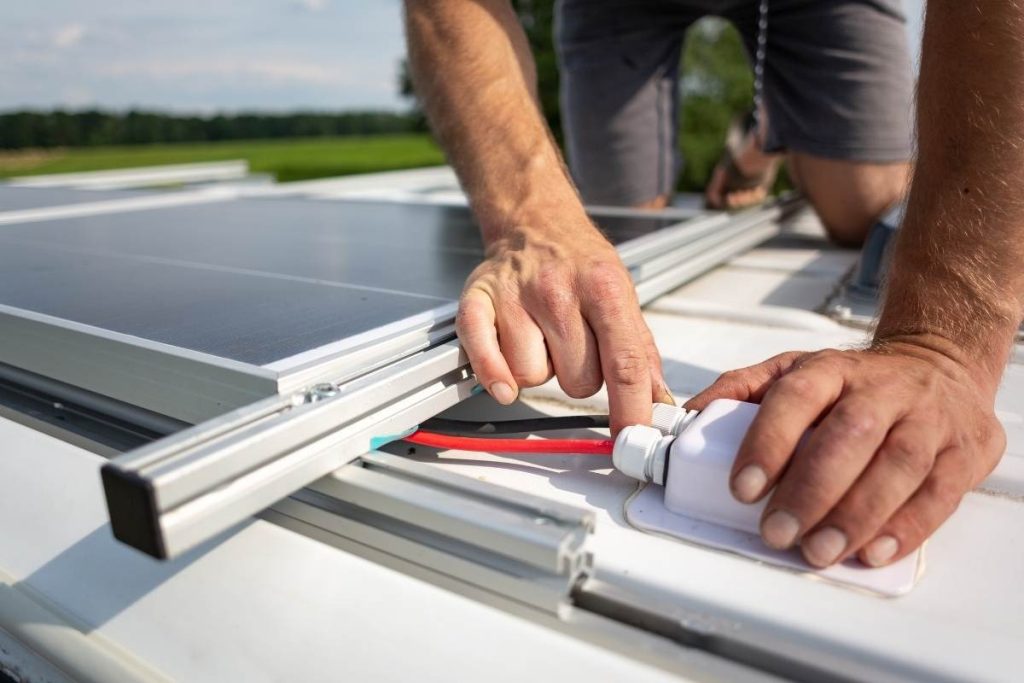
10 Essential Mounting Hardware and Accessories Needed for RV Solar Panel Installation
Equipping your RV with solar panels isn’t just about the panels themselves; the hardware and accessories used to mount and secure them are equally critical. A proper installation ensures safety during travel, maximizes solar energy capture, and prolongs the life of your panels.
Here’s a complete look at the mounting hardware and accessories you’ll need for an efficient RV solar panel setup:
- Mounting Brackets: These are the primary fixtures that hold the solar panels to your RV’s roof. They come in various styles, from corner brackets to side mounts, and are usually made of durable, weather-resistant materials like aluminum or stainless steel.
- Tilting Mounts: If you’re aiming for optimal solar capture, especially during the winter months or in higher latitudes, tilting mounts are invaluable. They allow you to adjust the angle of your solar panels relative to the sun, optimizing energy absorption.
- Roof Combiner Boxes: If you’re installing multiple solar panels, a combiner box consolidates the wiring into one conduit that runs into the RV. This not only keeps things tidy but also reduces potential points of failure.
- Cable Entry Glands: These are essential for creating a watertight seal where the solar panel cables enter the RV’s interior. They prevent water infiltration, which could damage your RV or the solar system’s electrical components.
- Cable Clips or Wire Management Clamps: These help organize and secure the cables running from your solar panels. Proper cable management prevents loose cables from getting caught or damaged while on the move.
- Solar Charge Controller Mount: While this might not be attached to the roof, it’s a crucial installation component. The charge controller regulates the power going from the panels to the batteries. You’ll need to mount it in an accessible location, usually inside the RV, close to the battery bank.
- Anti-Reflective Coating: Some RV owners opt to add an anti-reflective coating to their panels, enhancing their efficiency by reducing the amount of sunlight that gets reflected away.
- Edge Protection: The edges of solar panels can sometimes be sharp, which might pose a risk, especially during maintenance or cleaning. Edge protectors or guards can be added to ensure safety.
- Grounding Equipment: Proper grounding is essential for any electrical system, including RV solar setups. Grounding equipment, like grounding lugs and copper grounding wire, ensures that your system is safe from potential electrical malfunctions.
- Adhesive & Sealant: High-quality adhesive and sealant ensure the mounts and any drilled holes are sealed tightly, preventing any water leaks into your RV. UV-resistant sealants are especially recommended as they withstand long-term sun exposure without deteriorating.

Solar panels may be the heart of your RV’s solar system, but the mounting hardware and accessories are the skeleton that holds everything together. Investing in quality components and ensuring a thorough installation will keep your system robust and efficient for years to come.
Always consult or hire professionals for installation if you’re unsure about the process, as this will ensure the safety and efficacy of your solar setup.
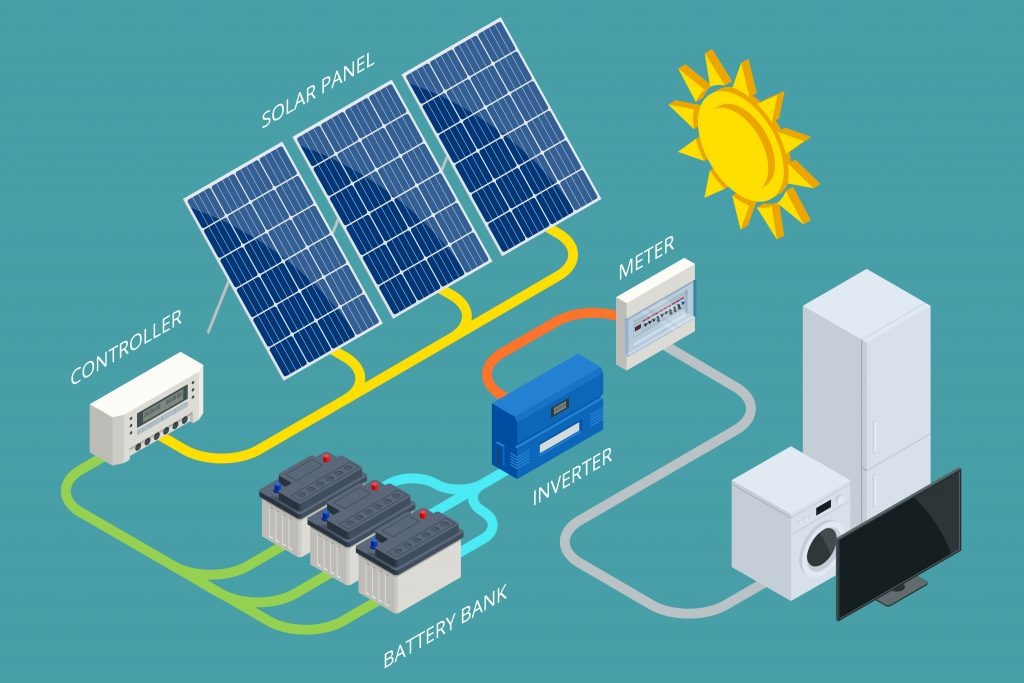
Battery Banks and Charge Controllers for RV Solar Panels
Solar panels on an RV harness the sun’s energy, but where does this power go and how is it managed?
Enter the unsung heroes of any RV solar system: battery banks and charge controllers. These components are vital cogs in the machine, working behind the scenes to store the sun’s energy and distribute it safely to your RV’s appliances and devices.
In this section, we’ll shed light on the importance of choosing the right battery banks and the role of charge controllers in maintaining the harmony and longevity of your entire solar setup.
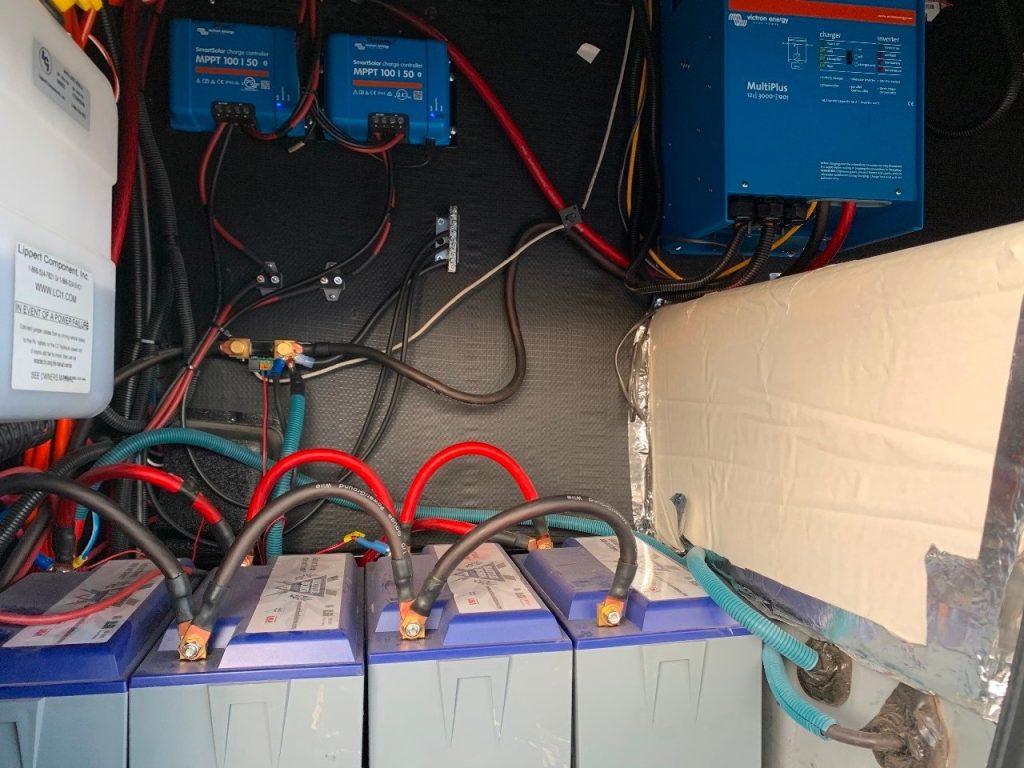
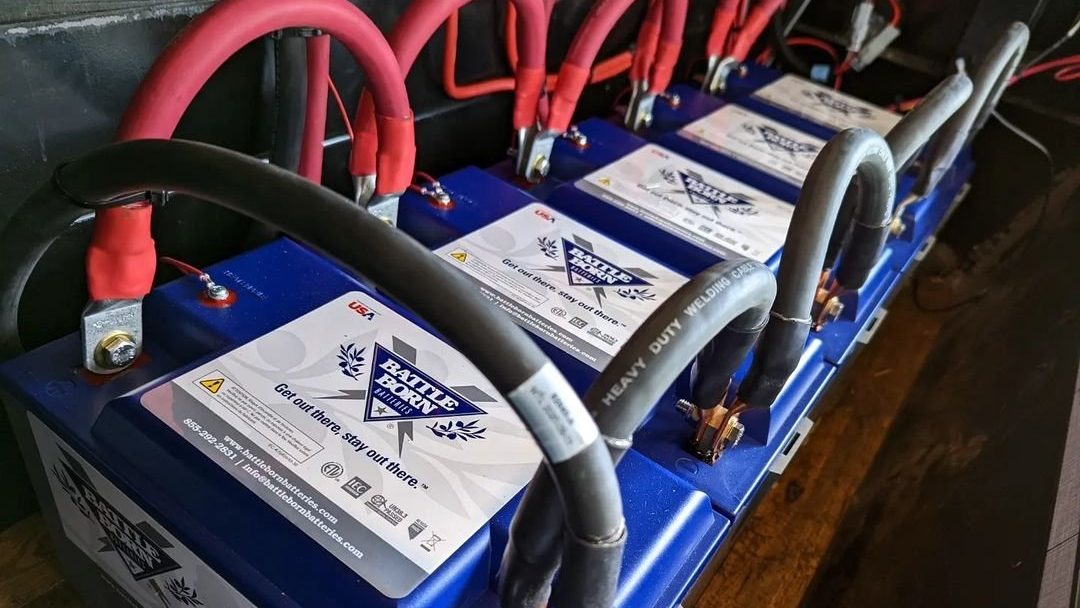
Battery Bank Options for RVs
Collecting the sun’s energy with solar panels on your camper is only one part of the equation. Storing this energy efficiently for use, especially when the sun isn’t shining, is where battery banks come into play. Paired with the regulatory power of charge controllers, these storage units become the beating heart of your RV’s solar system.
Solar Power Battery Type PROS & CONS
- Lead-Acid Batteries:
- Pros: They are the most traditional type of battery and are usually more affordable upfront.
- Cons: They tend to be heavier, have a shorter lifespan, and require regular maintenance, like topping off with distilled water.
- Charge Controller Pairing: A good PWM (Pulse Width Modulation) charge controller is often sufficient for lead-acid batteries, though MPPT (Maximum Power Point Tracking) controllers can be used for more efficiency.
- AGM (Absorbent Glass Mat) Batteries:
- Pros: These are a type of sealed lead-acid battery. They’re maintenance-free, have a longer lifespan than traditional lead-acid batteries, and can handle more frequent discharge cycles.
- Cons: They tend to be more expensive.
- Charge Controller Pairing: Both PWM and MPPT controllers work well, but MPPT can maximize the efficiency of these batteries.
- Gel Batteries:
- Pros: Like AGM, they are sealed and maintenance-free. They’re also known for their slow discharge rates and longer lifespan.
- Cons: More expensive than AGM and traditional lead-acid, and they require specific charging profiles to prevent damage.
- Charge Controller Pairing: MPPT controllers are ideal because they can be programmed to match the unique charging profile of gel batteries.
- Lithium-Ion Batteries:
- Pros: They’re lightweight, compact, have an extensive lifespan, and can handle deep discharge cycles without significant capacity loss.
- Cons: Their initial cost is higher, but this can be offset by their long lifespan and performance.
- Charge Controller Pairing: MPPT controllers are preferred, as they offer the programmability needed for lithium-ion batteries’ unique charging characteristics.
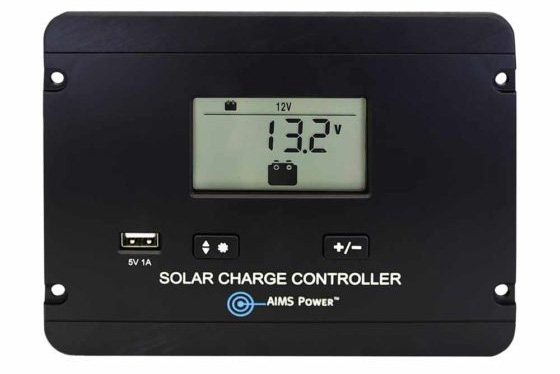
Charge Controllers: An Overview
Battery banks store energy, but it’s the charge controller that manages this storage, ensuring that batteries receive the right amount of power and aren’t overcharged.
They also prevent reverse current flow from batteries to solar panels during nighttime.
As touched upon earlier:
- PWM (Pulse Width Modulation) Controllers: These are more basic and affordable, modulating the amount of power sent to the batteries. They’re suitable for smaller systems or those with traditional lead-acid batteries.
- MPPT (Maximum Power Point Tracking) Controllers: More advanced and efficient, they adjust their input to harvest the maximum power from solar panels, then convert this power to the appropriate voltage for battery storage. Ideal for larger systems or premium battery types, they can increase solar energy harvest by up to 30%.
Next Steps in Finding Your Perfect RV Solar Panel Set up
When you first saw all the different solar panel types and wattages, you may have felt lost or overwhelmed.
There’s a lot to learn!
However, with the insights and details provided in this solar power guide, you now understand the basics of solar panels and how they can be a game-changer for your RV adventures.
Let’s Go! Getting Started with Solar Power.
Now that you’re armed with knowledge and have a trusted partner in Bish’s RV when you need extra advice, you’re truly prepared to take the next step.
It’s time to assess your specific needs, preferences, and ambitions. With this information at your fingertips, you can confidently determine the best solar panel setup tailored for your RV, ensuring a sustainable and empowered journey on the open road.
Solar Prepped and Solar Installed Campers come in all sizes and layouts.
Check out availability and pricing now.

Want to talk to a solar panel expert?
Our expert team of certified technicians can help!
Solar Ready RVs!
Want to see some “Solar Installed RVs? Check out these videos from Josh the RV Nerd.
Increase Your RV Knowledge
- The 2025 RV is Newer—So Why Is the 2024 Camper a Better Deal?
- 6 Nasty Surprises If You Don’t Get Your RV Ready for Spring

- Five RV Tech Upgrades to Improve Your Camping Trips
- Brinkley Model I 294 Review: Best Family Travel Trailer with Enclosed Bunkroom & Luxury Features

- How Much Does a Wayfinder RV Travel Trailer Cost?


Greg Long
Bish’s RV Content Manager
Amateur adventurer; professional dreamer.
aka: The Bish-Blog-Guy